
how to make metal name plates
2026-04-23
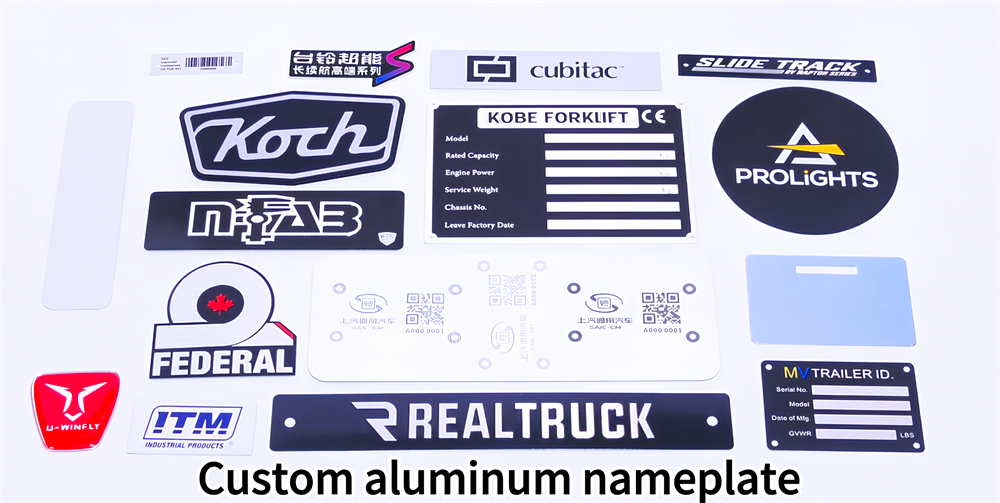
How to Make Metal Name Plates: A Step-by-Step Guide for Beginners & Pros
Metal name plates are versatile, durable, and perfect for branding, identification, and decoration—whether you’re making a custom name tag for your workshop, a decorative plaque for your home, or industrial labels for equipment. Unlike plastic or paper alternatives, metal name plates stand up to harsh conditions, resist fading, and add a professional, high-end touch to any project. The best part? With the right tools, materials, and a little patience, you can make metal name plates yourself, even if you’re new to metalworking. In this blog, we’ll break down the entire process, from choosing the right metal to adding the final finishing touches, so you can create custom metal name plates that last a lifetime.
How to Make Metal Name Plates: Core Principles & Preparation
Before diving into the step-by-step process, it’s important to understand the basics: metal name plate制作 relies on three key elements—material selection, design transfer, and finishing. The method you choose will depend on your skill level, the tools you have access to, and the look you want to achieve. We’ll cover both beginner-friendly methods (no heavy machinery required!) and more advanced techniques for those looking to take their projects to the next level. Let’s start with the foundation: preparation.
Step 1: Gather Your Tools & Materials
The right tools and materials are make-or-break for creating clean, professional metal name plates. Below is a comprehensive list, organized by beginner and advanced setups. You can adjust based on your budget and project goals.
Essential Materials for Metal Name Plates
The type of metal you choose will impact the durability, appearance, and difficulty of your project. Here are the most common options, along with their pros and cons:
1. Aluminum (Best for Beginners)
Aluminum is lightweight, affordable, and easy to work with—making it ideal for first-time metal name plate makers. It’s corrosion-resistant (especially if finished properly) and works well with engraving, stamping, and painting. Choose 0.020–0.032 inch thick sheets for a balance of rigidity and ease of cutting; common alloys like 3003 or 5052 are perfect for most projects .
2. Stainless Steel (Best for Durability)
Stainless steel is heavy-duty, rust-resistant, and has a sleek, modern look—great for industrial or outdoor name plates. It’s harder to cut and engrave than aluminum, so it’s better for intermediate or advanced users. Opt for 304 or 316 grade stainless steel for optimal corrosion resistance, especially for outdoor use .
3. Brass (Best for Aesthetics)
Brass has a warm, golden finish that ages beautifully, making it perfect for decorative name plates, door plaques, or vintage-style projects. It’s slightly softer than stainless steel but harder than aluminum, and it can be polished to a mirror shine or left to develop a natural patina .
4. Zinc Alloy (Best for 3D Designs)
Zinc alloy is ideal for die-cast or 3D relief name plates, such as logos for bags, wallets, or decorative badges. It’s easy to mold into complex shapes and has a substantial, premium feel .
Tools You’ll Need (Beginner-Friendly)
-
Metal sheet (aluminum is recommended for beginners)
-
Measuring tape, ruler, and pencil (for marking dimensions)
-
Metal snips or a utility knife (for cutting thin metal sheets)
-
Sandpaper (80-grit for rough edges, 240-grit for smoothing)
-
Permanent marker or transfer paper (for transferring your design)
-
Engraving tool (manual or battery-powered—for adding text/designs)
-
Primer and metal paint (for coloring and protecting the name plate)
-
Clear coat (spray-on or brush-on—for extra durability)
-
Clamps (to hold the metal sheet in place while working)
Advanced Tools (For Pros & Complex Projects)
-
Laser engraver (for precise, clean designs—ideal for fine text or logos)
-
Stamping press or hand stamping kit (for raised text/designs)
-
Chemical etching kit (for recessed designs and high-detail patterns)
-
CNC machine (for automated cutting and engraving)
-
Anodizing equipment (for coloring aluminum permanently)
-
Polishing wheel (for a mirror finish on brass or stainless steel)
Step 2: Design Your Metal Name Plate
Your design is the heart of your name plate—whether it’s a simple name, a logo, or a decorative pattern. Keep these tips in mind to ensure your design translates well to metal:
Design Tips for Metal Name Plates
-
Keep it simple: Intricate designs (like tiny text or complex patterns) can be hard to engrave or stamp, especially for beginners. Stick to bold, easy-to-read fonts (sans-serif fonts like Arial or Helvetica work best for legibility) .
-
Consider the size: Measure the space where your name plate will go, and design accordingly. Most custom name plates are 2–4 inches wide and 1–2 inches tall, but you can adjust based on your needs.
-
Test your design: Draw your design on paper first, or use a digital tool (like Canva or Adobe Illustrator) to create a template. Print it out and hold it against the metal sheet to ensure it looks balanced .
How to Transfer Your Design to Metal
Once your design is final, you need to transfer it to the metal sheet—this ensures your engraving/stamping is accurate. Here are two easy methods:
Method 1: Transfer Paper (Beginner-Friendly)
-
Print your design on transfer paper (available at craft stores or online).
-
Cut out the design, leaving a small border around the edges.
-
Clean the metal sheet with rubbing alcohol to remove dirt or oil (this helps the transfer stick).
-
Place the transfer paper face-down on the metal, and rub firmly with a credit card or bone folder to transfer the design.
-
Peel off the transfer paper—your design should be visible on the metal.
Method 2: Permanent Marker (Quick & Easy)
-
Print your design on regular paper, and cut it out.
-
Trace the outline of the design onto the metal sheet using a permanent marker.
-
Fill in any text or details with the marker—this works best for simple designs.
Step 3: Cut the Metal to Size
Now it’s time to cut the metal sheet to the size of your name plate. This step requires care to avoid bending the metal or creating rough edges. Follow these steps:
Cutting Thin Metal (Aluminum, Brass—Beginner)
-
Mark the dimensions of your name plate on the metal sheet using a ruler and pencil. Double-check your measurements to avoid mistakes.
-
Clamp the metal sheet to a workbench or table to hold it in place (this prevents it from moving while cutting).
-
Use metal snips to cut along the marked lines. For straight cuts, use straight snips; for curves, use curved snips. Cut slowly and steadily to avoid jagged edges.
-
Once cut, use 80-grit sandpaper to smooth any rough edges. Then switch to 240-grit sandpaper to create a smooth, even edge.
Cutting Thick Metal (Stainless Steel—Advanced)
Thicker metal (like stainless steel) requires more powerful tools. Use a jigsaw with a metal-cutting blade, a laser cutter, or a plasma cutter for clean, precise cuts. If you don’t have access to these tools, you can have the metal pre-cut at a hardware store or metal supply shop .
Step 4: Add Your Design (Engraving, Stamping, or Etching)
This is the most creative step—adding your text, logo, or pattern to the metal. The method you choose depends on your tools, skill level, and desired look. We’ll cover three common methods:
Method 1: Manual Engraving (Beginner)
Manual engraving is simple, affordable, and perfect for beginners. All you need is a manual or battery-powered engraving tool (available at craft stores for $10–$20).
-
Clamp the metal name plate to a workbench to keep it stable.
-
Hold the engraving tool like a pen, and follow the transferred design. Apply light, steady pressure—too much pressure can scratch the metal or break the tool.
-
For text, engrave slowly and evenly to ensure the letters are straight and legible. For decorative patterns, follow the lines of your design.
-
Once finished, use a soft cloth to wipe away any metal shavings.
Method 2: Stamping (Intermediate)
Stamping creates raised text or designs, which adds a 3D effect to your name plate. You’ll need a hand stamping kit (with letter/number stamps) or a stamping press .
-
Position the metal name plate on a hard, flat surface (a steel block works best).
-
Align the stamp with the transferred design, and hold it firmly in place.
-
Tap the top of the stamp with a hammer (use a rubber mallet to avoid damaging the stamp). Tap once firmly—this creates a raised impression.
-
Repeat for each letter or design element, making sure the stamps are aligned evenly.
Method 3: Laser Engraving or Chemical Etching (Advanced)
For precise, professional-looking designs (like logos or fine text), laser engraving or chemical etching is the way to go .
Laser Engraving
Laser engravers use a high-powered laser to etch designs into the metal, creating clean, permanent marks. This method is ideal for complex designs, serial numbers, or barcodes. If you don’t own a laser engraver, many local makerspaces or print shops offer laser engraving services for a small fee .
Chemical Etching
Chemical etching involves using a chemical solution to dissolve the metal in specific areas, creating a recessed design. You’ll need a chemical etching kit (available online) and protective gear (gloves, goggles) to stay safe. Follow the kit instructions carefully—this method requires precision but creates a professional finish .
Step 5: Finish Your Metal Name Plate (Protect & Enhance)
The final step is finishing your name plate—this protects it from rust, fading, and wear, and enhances its appearance. The finish you choose depends on the metal and the look you want:
Finishing Options for Metal Name Plates
1. Painting (Beginner)
-
Clean the name plate with rubbing alcohol to remove any oil or metal shavings.
-
Apply a thin coat of metal primer (this helps the paint adhere to the metal).
-
Let the primer dry completely (follow the instructions on the can—usually 1–2 hours).
-
Apply 1–2 thin coats of metal paint (choose a color that complements your design). Let each coat dry before applying the next.
-
Once the paint is dry, apply a clear coat (spray-on or brush-on) to protect the paint and add shine.
2. Polishing (For Brass/Stainless Steel)
Polishing creates a mirror-like finish, perfect for brass or stainless steel name plates. Use a polishing wheel or a polishing compound (available at hardware stores) to buff the metal until it shines. For a natural patina on brass, skip polishing—let it age naturally over time .
3. Anodizing (For Aluminum)
Anodizing is a process that creates a protective layer on aluminum, and it can be dyed to add color. This is an advanced method that requires specialized equipment, but it creates a durable, permanent finish. You can buy anodizing kits online, or have your name plate anodized by a professional .
4. Clear Coat (All Metals)
Even if you don’t paint or polish your name plate, a clear coat is a good idea—it protects the metal from rust and wear. Use a spray-on clear coat (urethane or acrylic) for easy application, and let it dry completely before using the name plate .
Pro Tips for Making Perfect Metal Name Plates
-
Test on scrap metal first: Before working on your final name plate, practice engraving, stamping, or painting on a scrap piece of metal. This helps you get comfortable with the tools and avoid mistakes.
-
Wear protective gear: When cutting, engraving, or using chemicals, wear gloves and safety goggles to protect your hands and eyes—metal shavings and chemicals can be dangerous .
-
Take your time: Rushing through steps (like cutting or engraving) can lead to mistakes. Slow down, and focus on precision—your name plate will look better in the end.
-
Match material to environment: Choose aluminum or stainless steel for outdoor use (they’re corrosion-resistant), and brass for indoor decorative projects .
-
Use vector designs: For laser engraving or chemical etching, use vector files (AI, CDR) for crisp, clean lines—raster images can appear blurry .
Final Thoughts: Enjoy Your Custom Metal Name Plate!
Making metal name plates is a rewarding project that combines creativity and practicality. Whether you’re a beginner using basic tools or a pro with advanced equipment, the process is simple once you break it down: gather your materials, design your plate, cut the metal, add your design, and finish it for durability. With a little practice, you’ll be able to create custom metal name plates for your home, workshop, business, or gifts—pieces that are built to last and look great. Now grab your tools, pick your metal, and get started—your perfect metal name plate is just a few steps away!
how to remove adhesive labels from metal
what adhesive sticks to plastic
Related Article

When shopping for office, hotel, school, or business branding supplies, one of the most common questions is: How much are name plates? Many people assume custom name plates are expensive, exclusive luxury items with high customization fees and complicated pricing rules
How Much Are Name Plates

Crystal clear epoxy resin is one of the most practical surface finishing materials for commercial labels, brand stickers, and metal/plastic nameplates.
Benefits of Crystal Clear Epoxy on Nameplates